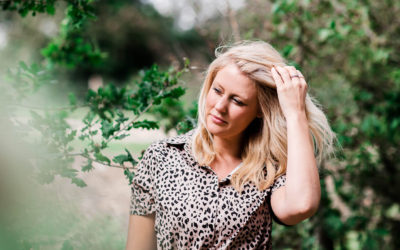
Editing your images is the secret ingredient for a professional look.
Lightroom is my most used and favourite app to give my photos the look I want them to have. The mobile app is a great and easy way to edit your photos on the go, brighten the image, remove blemishes (paid version) and use presets. I wanted to share with you guys some tips on how to edit your own photos with the Lightroom app. We all take pictures on our phone and that’s awesome but to get the best out of your images you should always give them the extra love they deserve.
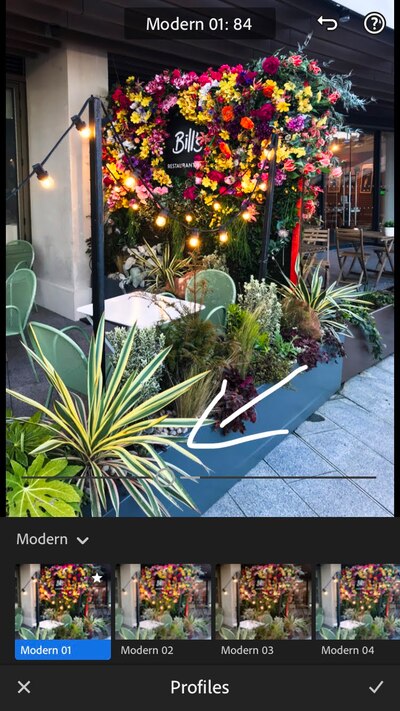
First I recommend to straighten your image if it needs to. I always take wonky images so I have to do this every time. Jut go to the “Crop” function where you can rotate to the left or right. In here you can also crop the image if you want. You can always go back and undo the step if you’re not happy with the change. If you never used Lightroom before I recommend to explore the different Profiles and Presets Adobe has saved in the App. Some of them are quite heavy but don’t worry you can always reduce them by using the slider. If you ever want to see the before and after you just click on the photo, hold and release.
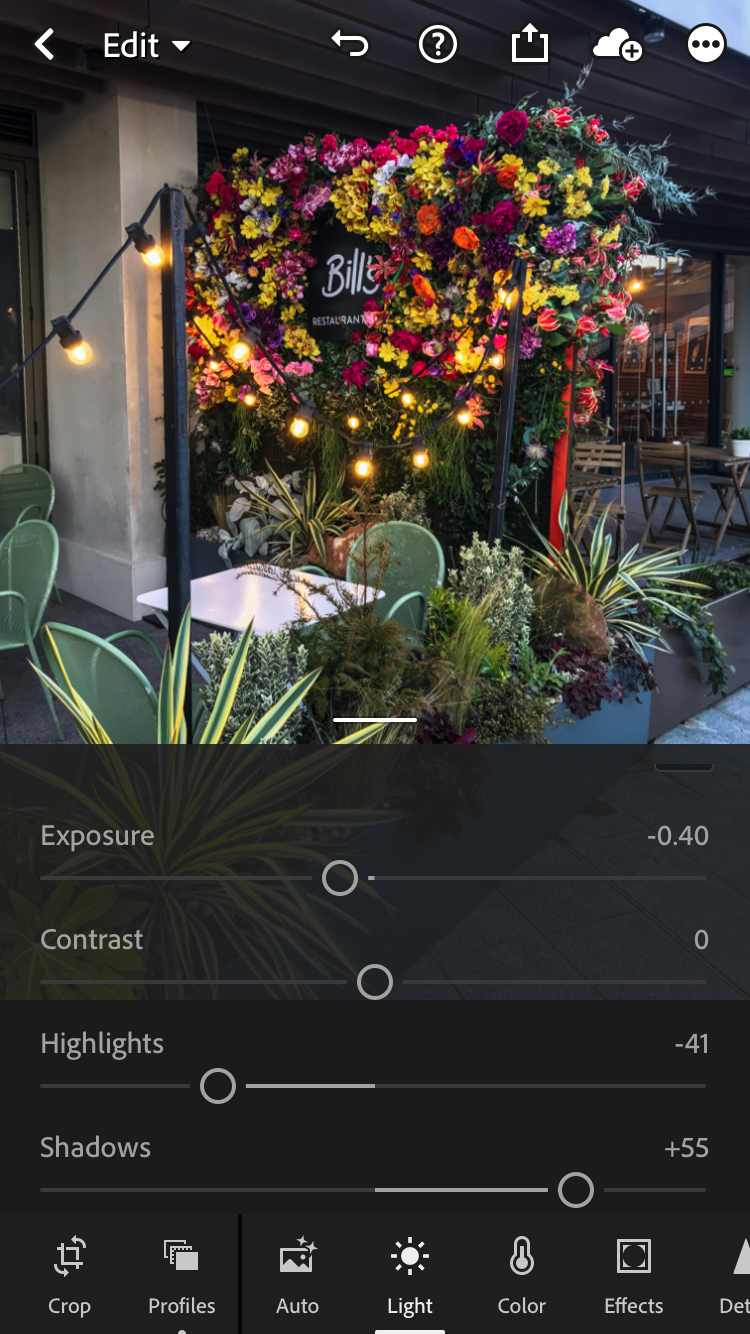
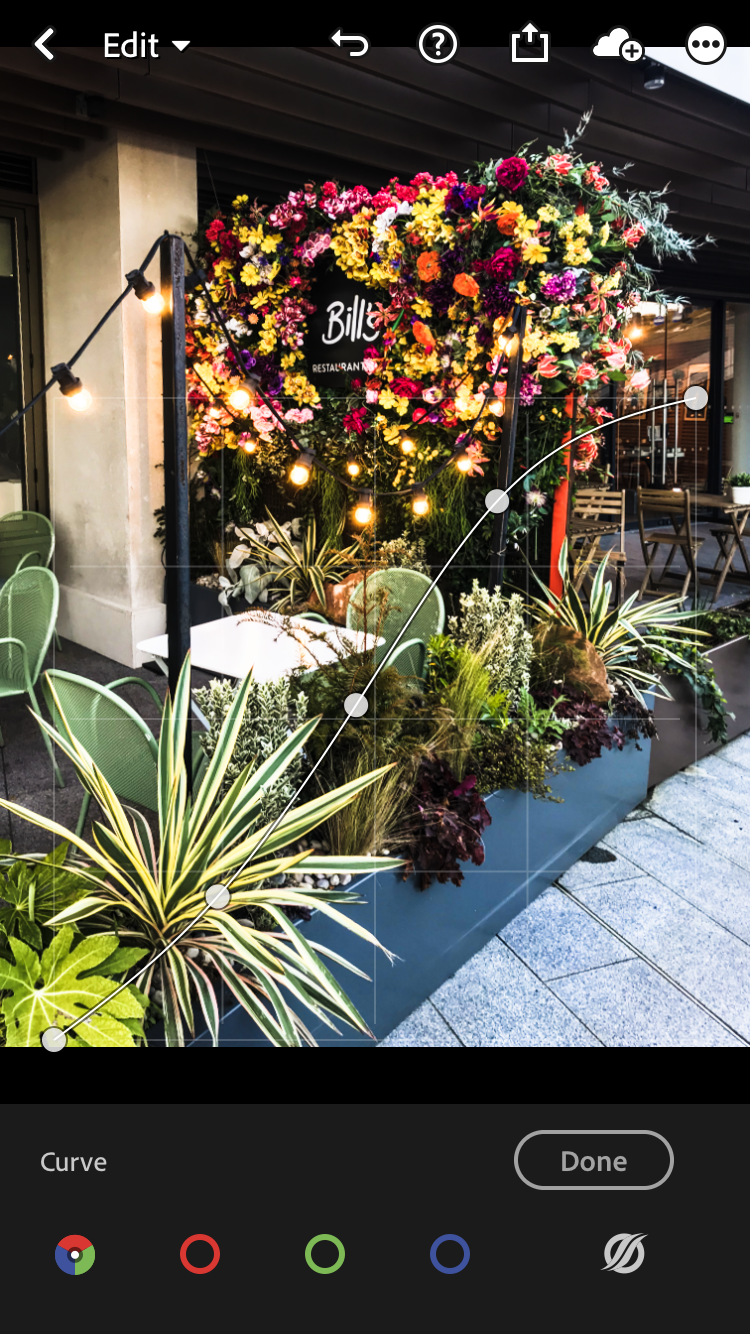
I usually go to “Light” and lift up the Shadows and reduce the Highlights to even out the image. If my image is quite bright I then reduce the Whites as well and move down the Blacks to give the image a bit of contrast. I also have a look at my Curve which you also find in the “Light” section above Exposure in the top right corner. The bottom axis of the Curve are the Shadows, at the top of the Curve are the Highlights and in the middle you find the Midtones. To give your image a bit more pop you can create n S-Curve by setting anchor points and moving them up and down. Use this in moderation as every little change has a big impact. By the way you can also change the colour channels (RGB) separately in the Tone Curve and give your image a complete different look. Most of presets use the RGB-Curve to create different colour schemes.
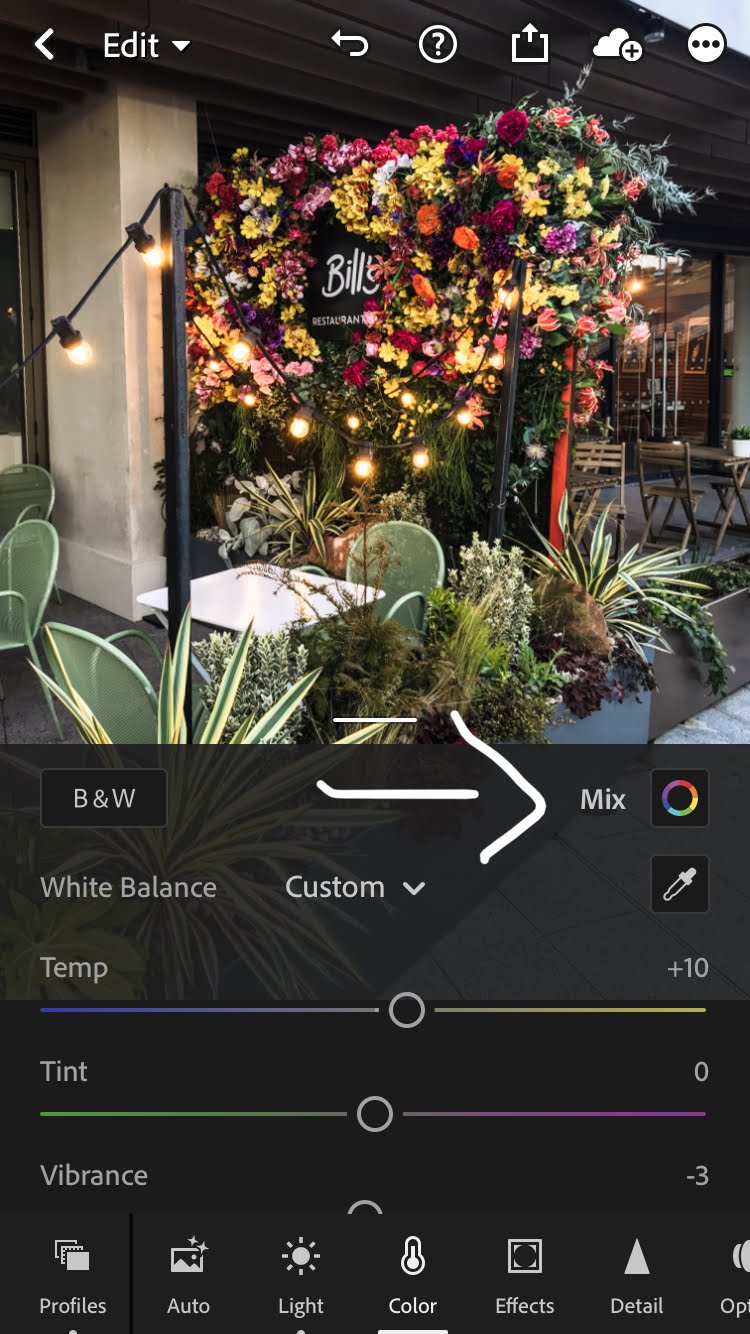
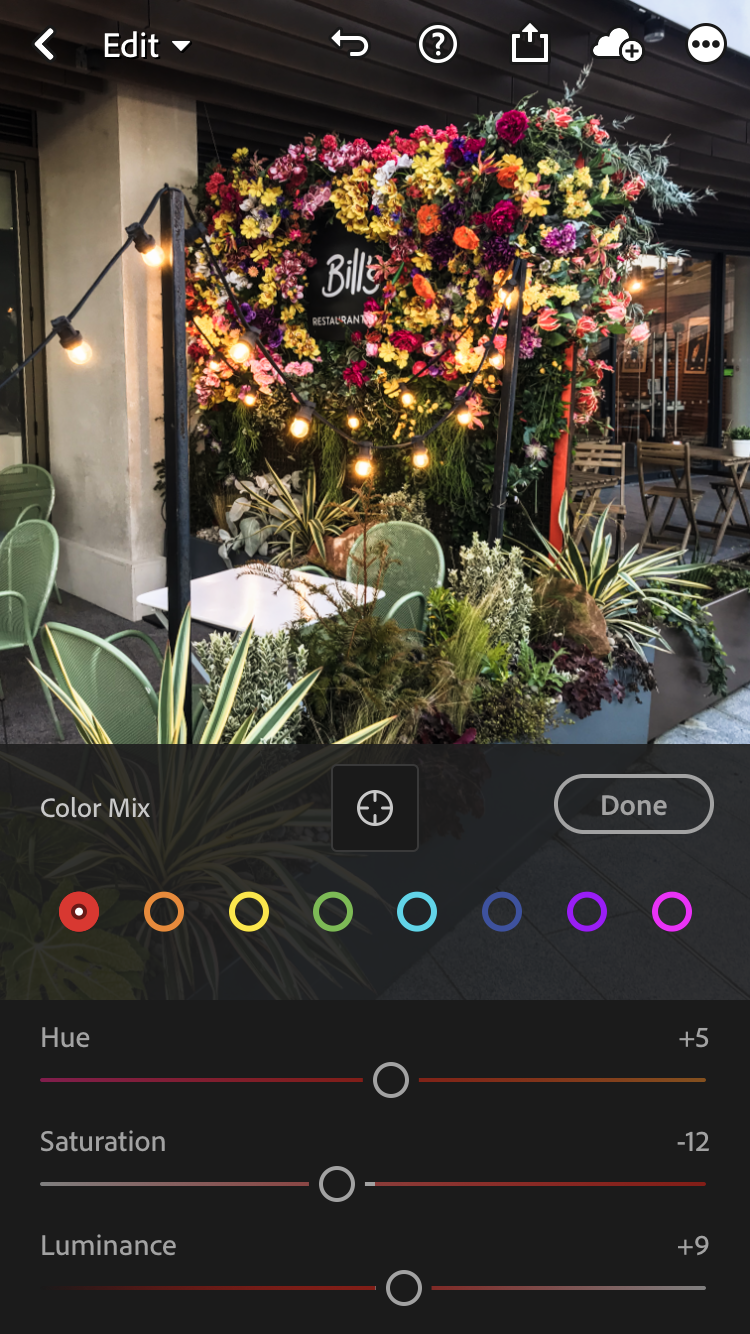
Next I go to “Colour” and adjust the Temperature and Tint of my image depends on the look I am going for. You can add or reduce the Vibrance and Saturation though use these two features in moderation. It can look quickly tacky when overused. If you want you can use the “Colour Mix” and change colours individually by changing the Luminance, Saturation or Hue depends on the colour scheme you’re going for. A lot of times I reduce the Saturation of the greens and brighten up the yellows, oranges and reds, this will affect the skin tones, so careful.
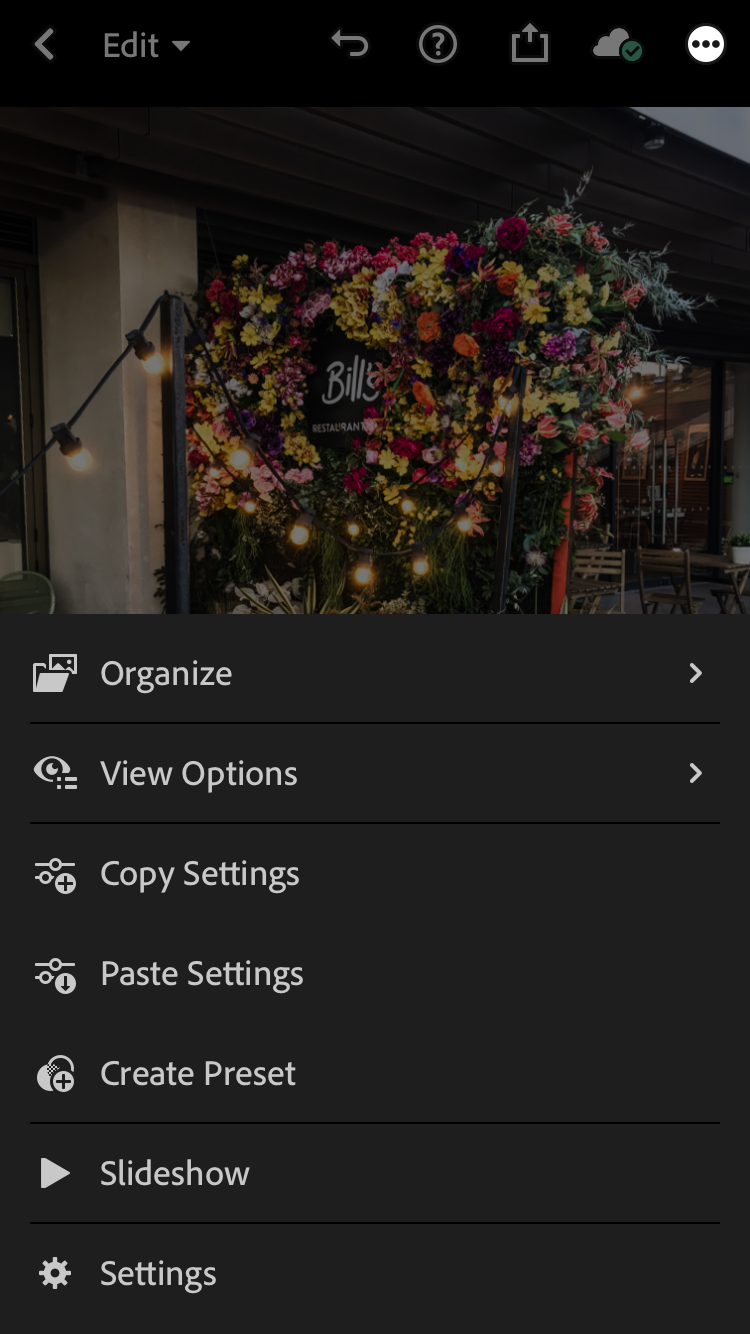
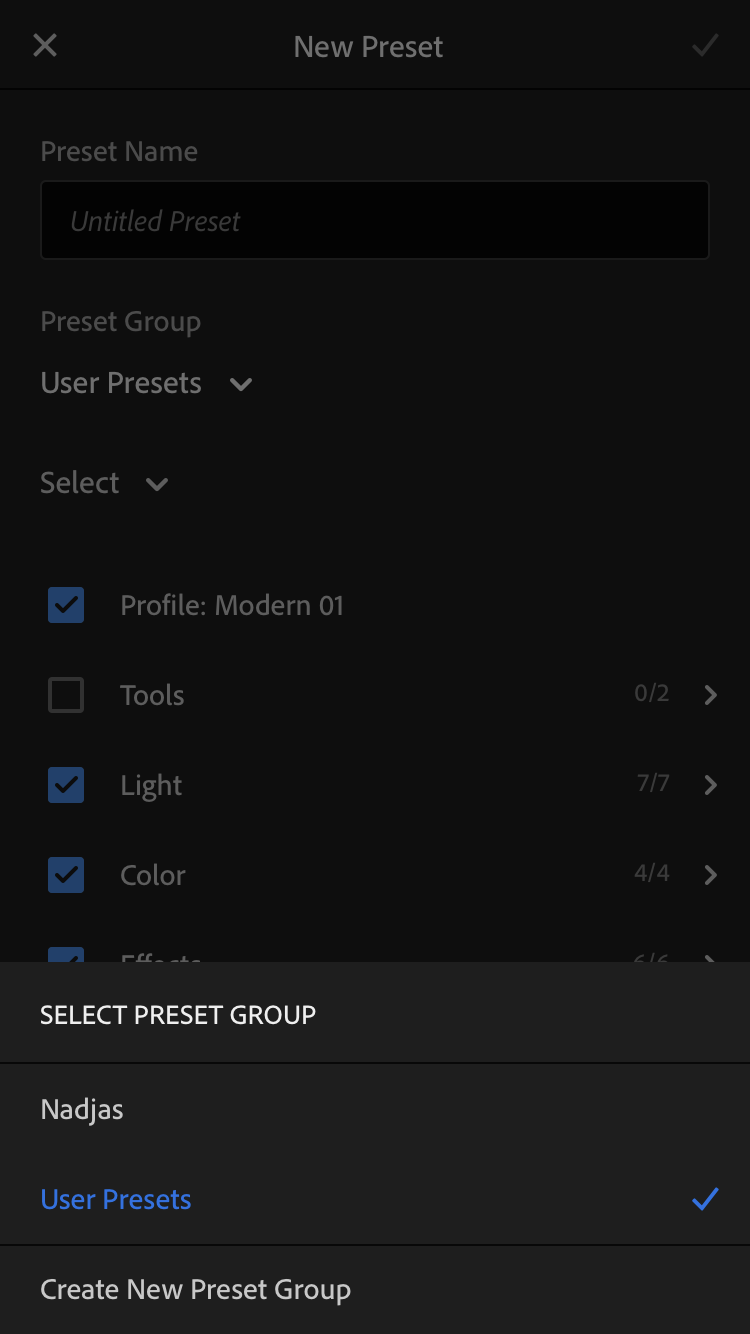
Just experiment. There is no right or wrong. Try out all the tools and maybe you will find your own editing style. There is one more really great feature I want to talk about and that’s the Preset option. Once you are happy with your edited image you can copy all the settings and apply them to the next image and even better you can save your settings as your own Preset. Go to the three dots in the top right corner and choose “Create Preset”. Give the Preset a name and if you want you can create a new Preset Group so you can always find your own Preset quick and easy. Using Presets means you will always have a consistent look and style in your images and online presence.
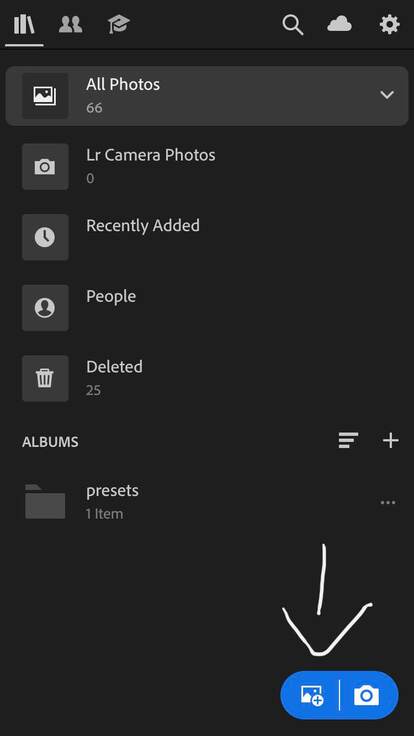
Once you saved your preset just go into your library and open any photo you would like to edit. Find the Preset Icon in the menu at the bottom of the screen and select it. Make sure the Preset Group selected is the one where you saved your new preset.
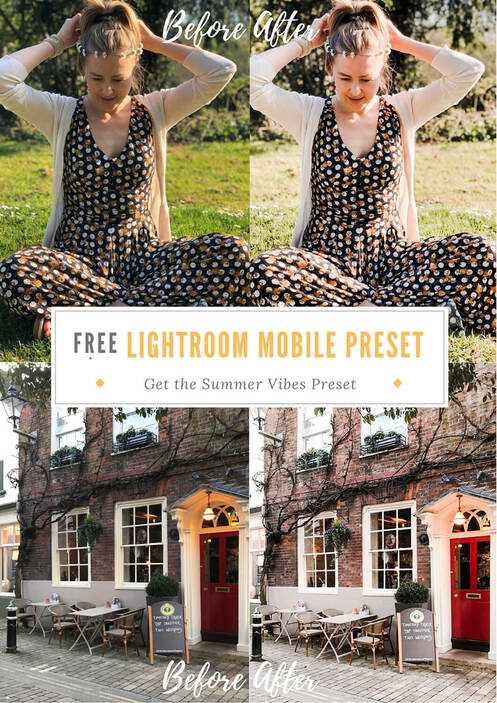
There are lots of great Presets out there you can purchase for just a few Quid. I also created my own Lightroom Preset “Summer Vibes” and I am very happy to share it with you. Go ahead and sign up for my Newsletter and you will receive immediate access to my “Summer Vibe Preset” which is great if you like the warm and bright look with a little bit of punch.
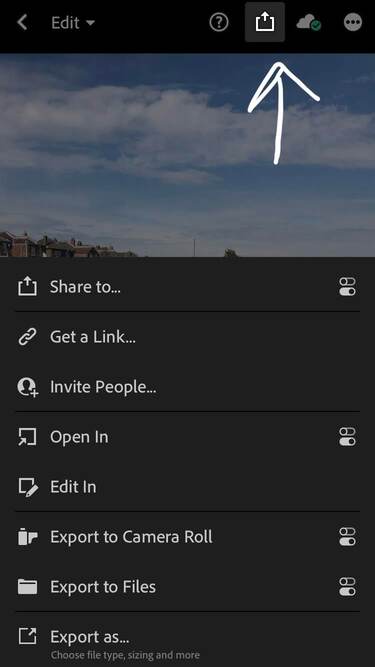
Now it’s time to Export your edited image. Click on the sign next to the question mark just above the image and choose Export to Camera Roll or Gallery. Taadaa! And you’re have a beautifully edited photo you can now share with the world. Have fun playing around and creating gorgeous images.
Want more tips?
Creative Garden Designer in Frome – Diane Samways
How it starts Diane, from Diane Samways Garden Design, had a clear idea of what she needed when she got in touch with me. This is normally not the case for most of my clients and that is ok too. You don't need to have it all figured out to want a personal brand shoot....
What is the difference between Headshot and Personal Brand Photography?
This question came up on LinkedIn when I posted a few images of one of my past clients and her personal brand photoshoot One of my LinkedIn contacts messaged me straight after to book a shoot. When we started to discuss what type of shoot she was actually looking for,...
Hampshire Personal Brand Photoshoot with Koala Marketing
My clients are killing their Personal Brand Photoshoot and this super woman is no exception. Let me introduce her for you. Caleigh is the creative genius behind Koala Marketing, a marketing agency who encourages their clients to ethical and eco friendly solutions and...
